

From time to time, and as a way of “relaxation”, I have the opportunity to work on random technology challenges using code. On this occasion, the challenge was quite interesting and sought to convert a video input, coming from the webcam, into ASCII art.
The ASCII art is:
ASCII art (pronounced áski art), is an artistic medium that uses computerized resources based on the printing characters of the American Standard Code of Information Interchange.
That is, and in much simpler words, it is the way in which we can create an artistic medium from just text characters.
I made the initial model with Python and using libraries such as pygame, numpy, cv2 and others, but for this post I was interested in doing the same using only JavaScript.
#.Preliminary concepts: what is an image and how are the colors of a pixel represented?
Let’s start with the concept behind this idea. Each image or photograph is actually made up of a group of pixels. In fact, in case you didn’t know, “pixel” comes from ”picture element”.
Each of these pixels is associated with a color, which in turn is represented in the RGB palette (Red Green Blue / Red Green Blue) with a three-number code. Each of those numbers can range from 0 to 255 (that is, they can be 256 values).
An RGB code could look, in decimal notation, like this: 0 0 255.
- The first 3 numbers would represent the color Red (Red)
- The second 3 numbers would represent the color Green (Green)
- The last 3 numbers would represent the color Blue (Blue)
Therefore, the code shown above (0 0 255) would represent a completely blue pixel. If all the numbers are 0, it means it is black. If they are all 255, it means it is white. These colors can also be represented in hexadecimal and those are the ones we see as #ffffff (hexadecimal), which means 255 255 255 (in decimal), but that is another story that we are not going to tell right now.
The important thing about this is: the larger the series of colors, the brighter the pixel. This is important, since we are going to use it as a base very soon.
Taking this into account, a very, very simple way to obtain the brightness of a pixel is by calculating the average of that series of 3 decimal numbers.
That is, if we have:
255 200 200We can calculate the average of:``` (255 + 200 + 200) / 3 = 218.33333333
And that value, `218.33333333`, we could use to represent the brightness of that pixel.  Since it's very close to 255, it's a pretty bright color, in fact it looks <span style="background-color: rgba(255, 200, 200, 1)">like the background of this text</span>.

#### Contrasts, brightness and references to a character

Good.  We already know how we can extract the brightness of a pixel, therefore we can extract the brightness of each element of the image (remember an image = many pixels).  Now, how do we turn it into text?

Now the following concept is important.  We could represent any element with two basic colors: white and black, where black is no brightness and white is a lot of brightness.

Thanks to this we can play with contrasts, specifically luminosity contrasts, which is the relative difference between two points (or pixels) in an image using the brightness value as a reference.

If we talk in black and white, everything can be in two tones (either it is white or it is black).  If we now talk about gray scales, contrast can go from none (0% contrast, as when two elements are the same color) to full (100% contrast, as when one element is totally white and the other totally black).

In this way, if we have two characters:

- Character #1: █ (a completely black block)
- Character #2: _ (a blank space)

One could represent a totally black (or no brightness/brightness) pixel and the other could represent a totally white (or full brightness/brightness) pixel.  And if we put them next to each other, we would have complete contrast between the two.

Therefore, what we should try to do is assign a character to each possible numerical value of that brightness value, in order to generate the contrast between the characters and thus represent the contrast of the image.

In fact, [here](https://play.ertdfgcvb.xyz/) I came across a character string that did it quite well and it looks like this:
‘Ñ@#W$9876543210?!abc;:+=-,._ ’
The first value, `Ñ`, being the one that would represent no brightness and the last value, a blank space, would represent the total or complete brightness.

In that code I also noticed that the author called it "density", which is an interesting name, since we could say that the mission of each character is to use as much space as possible to represent that area.  That is, more density = less shine.

In simpler words and combining the previous section with this one:

> If the average brightness value is 0, we would use the Ñ.
>
> If the average brightness value is 255, we would use the white space.  Any value between 0 and 255 would use a value between the two.

### Ok, ok, lots of talking. How do you eat this?

I already said that we are going to use JavaScript, because we can use the [p5.js](https://p5js.org/) library.  This library is:

> a library for creative programming, with a focus on making programming accessible and inclusive for artists, designers, educators, learners and anyone else (...)
>
> (...) you can use HTML5 elements such as text, _input_, **video, webcam** and sound.

The important part is that we have access to use the available video and sound features simply and easily.

We're going to start with a basic HTML page and we're going to include `p5.js`.

#### Step 1: Setting up the project and deploying an image

First, let's configure the project.  For that, we are going to create a folder and go to the `p5.js` page and [download the complete library](https://github.com/processing/p5.js/releases/download/v1.4.1/p5.zip).  Then we pass the files `index.html`, `sketch.js` and `p5.min.js` (the minified version) to our folder:

```bash
mkdir video-to-ascii
cd video-to-ascii
cp ~/Downloads/p5/index.html .
cp ~/Downloads/p5/sketch.js .
cp ~/Downloads/p5/p5.min.js .
The first thing is to understand how p5.js works, but for that you can read this guide. The library expects to have two functions: setup and draw, so we must have both functions in our sketch.js.
Now we are going to do something simple, using all the concepts from the previous points: we are going to pass a flat image to ASCII art. We are going to separate the image into quadrants, represented by { x, y } or {i, j}, as we will see (where i represents the position in the x plane and j in the y plane).

For each of these positions, we will calculate the RGB value and we will also calculate that brightness or luminosity value. That is, each quadrant will have 6 values:
i: row positionj: column positionr: red value of that pixelg: green value of that pixelb: blue value of that pixela(aveage / average): brightness / luminosity value of that pixel
Note: You may wonder what does an image have to do with a video? Well, video is simply a series of images (frames) in sequence. What we will have to do is analyze each frame independently.
For the test, we go to Unsplash and download any photo, for example this photo of a doggy taken by Victor Grabarczyk.
To be able to load these resources in Chrome, we can use Web Server for Chrome or simply configure a server with Express. Using p5.js, we can now preload that image using the preload function and the loadImage() function.
Then we can simply display the image using some code:
let img;
function preload() {
  img = loadImage("./dog.jpg");
}

function setup() {
  createCanvas(800, 533);
}

function draw() {
  background(220);
  image(img, 0, 0, width, height);
}
The result will be pretty simple, for now:
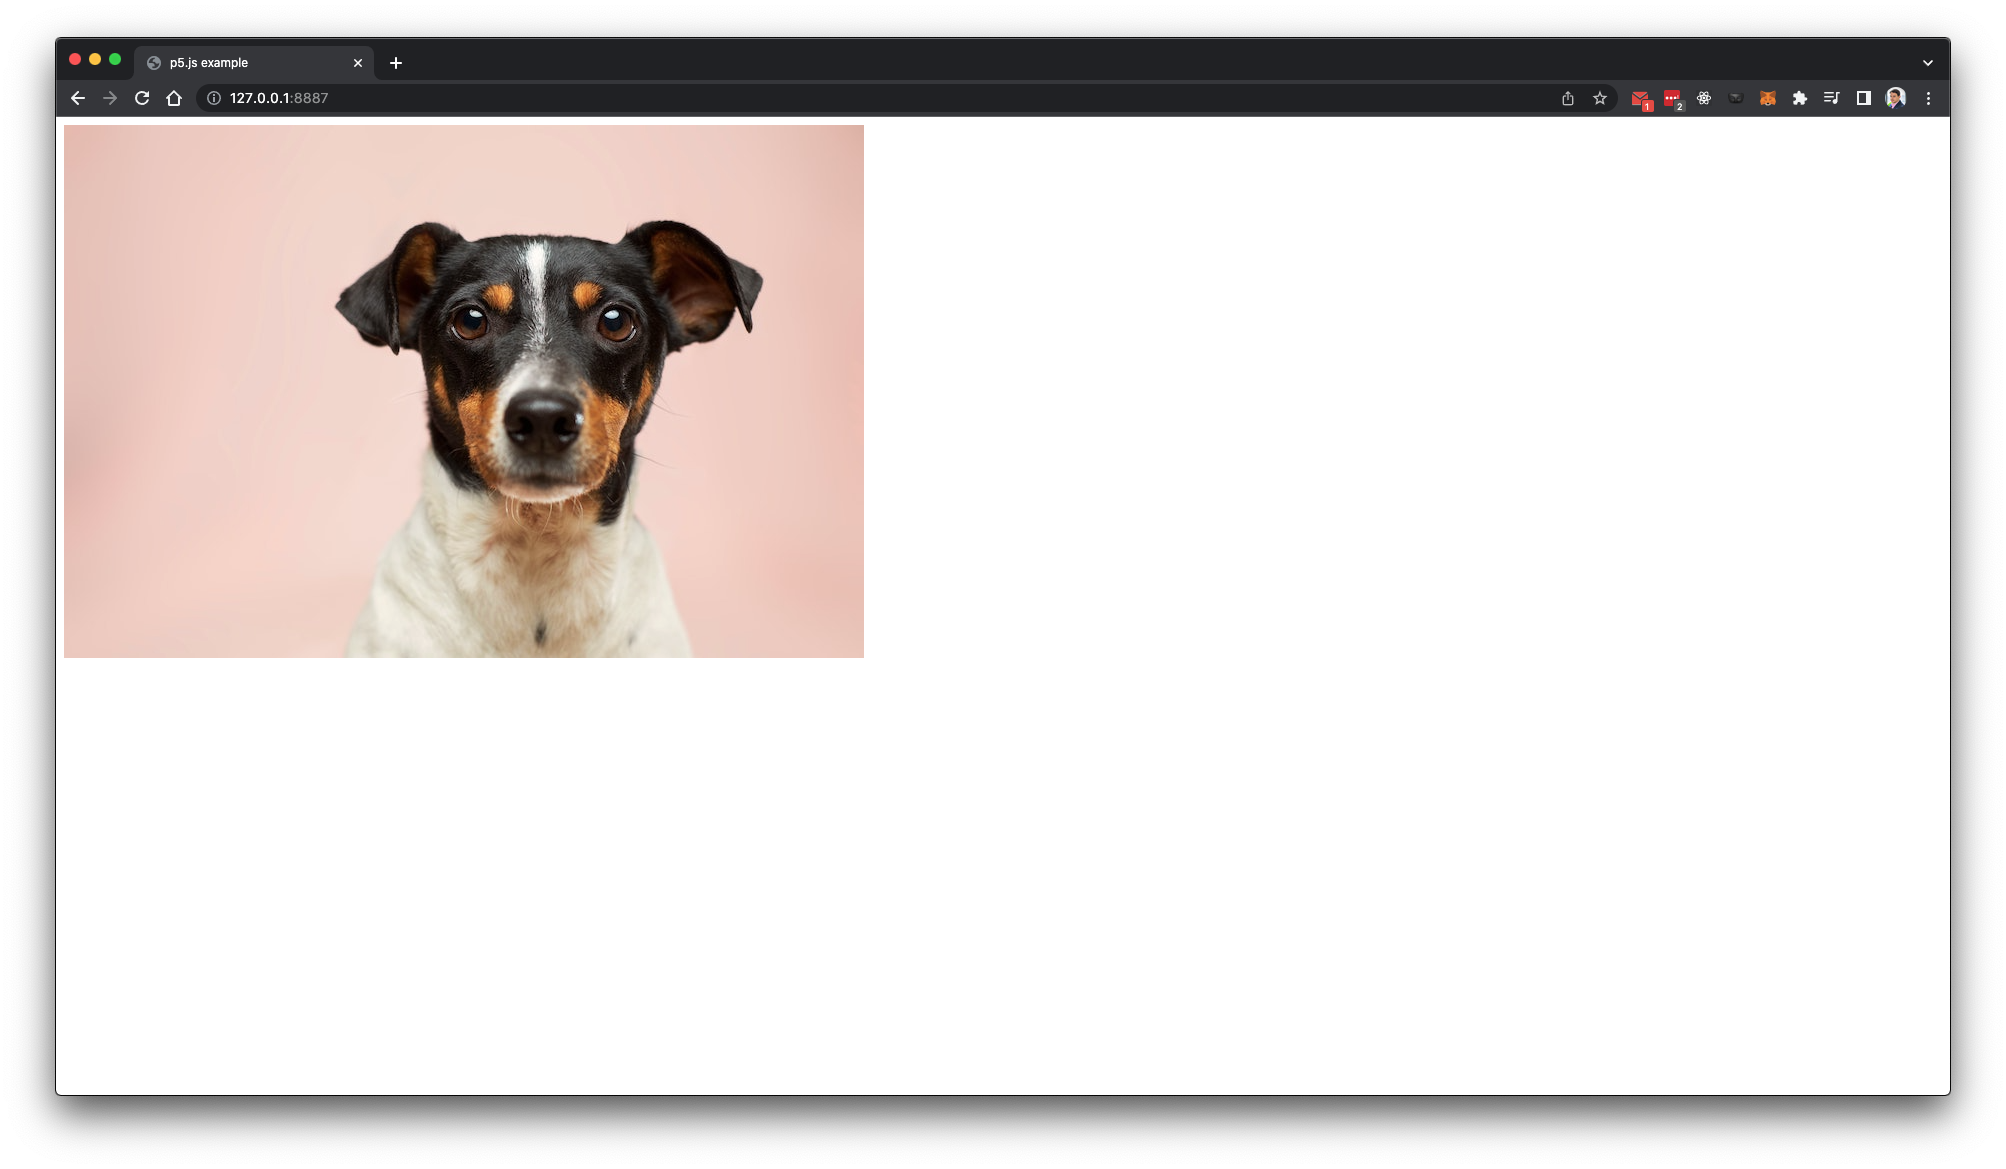
Now we will propose to transform this image into art with ASCII. To make it more comfortable, we are going to resize the image of the dog to 50 pixels wide.
We have to:
- Load the image and pixels. I’ll explain a little about this shortly.
- Iterate between the columns/rows.
- Obtain the index (the
{i, j}value) and the other 4 values mentioned above (r, g, b, a). - Determine which character corresponds to it, based on its brightness.
The code in question would look like this:
const density = "Ñ@#W$9876543210?!abc;:+=-,._ ";
let img;
function preload() {
img = loadImage("./dog copy.jpg");
}
function setup() {
noCanvas();
img.loadPixels();
// Analizamos cada columna
for (let j = 0; j < img.height; j++) {
let line = "";
// Analizamos cada fila de esa columna
for (let i = 0; i < img.width; i++) {
// Es importante recalcar que, img.pixels va a regresar un array, mejor
// descrito en la siguiente dirección:
// https://p5js.org/reference/#/p5/pixels
//
// Donde:
// 1. La densidad será x4, por eso debemos multiplicar *4
// 2. Va a regresarse los valores de RGB (en la posición 0, 1 y 2)
const index = (i + j * img.width) * 4;
// Valores RGB y A (promedio / brillo / luminosidad)
const r = img.pixels[index];
const g = img.pixels[index+ 1];
const b = img.pixels[index + 2];
const a = (r + g + b) / 3;
// Floor: Devuelve el máximo entero menor o igual a un número.
// El `map` aquí va a hacer:
// Tomar el valor del brillo (`a`), el cual debe tener un valor entre
// 0 y 255 (atributo 1 y 2) y lo va a mapear esto a un valor entre la cantidad
// de valores entre mi densidad y 0.
const charIndex = floor(map(a, 0, 255, density.length, 0));
const charToShow = density.split("")[charIndex];
// no breaking space (espacio vacio)
// esto es para que quede un cuadrado perfecto, ya que en HTML el espacio
// vacío se representará como un eso, un espacio vacío.
line += (charToShow === " " || charToShow === undefined) ? " " : charToShow;
}
createDiv(line);
}
}If we run this code, we will find this somewhat discouraging result:
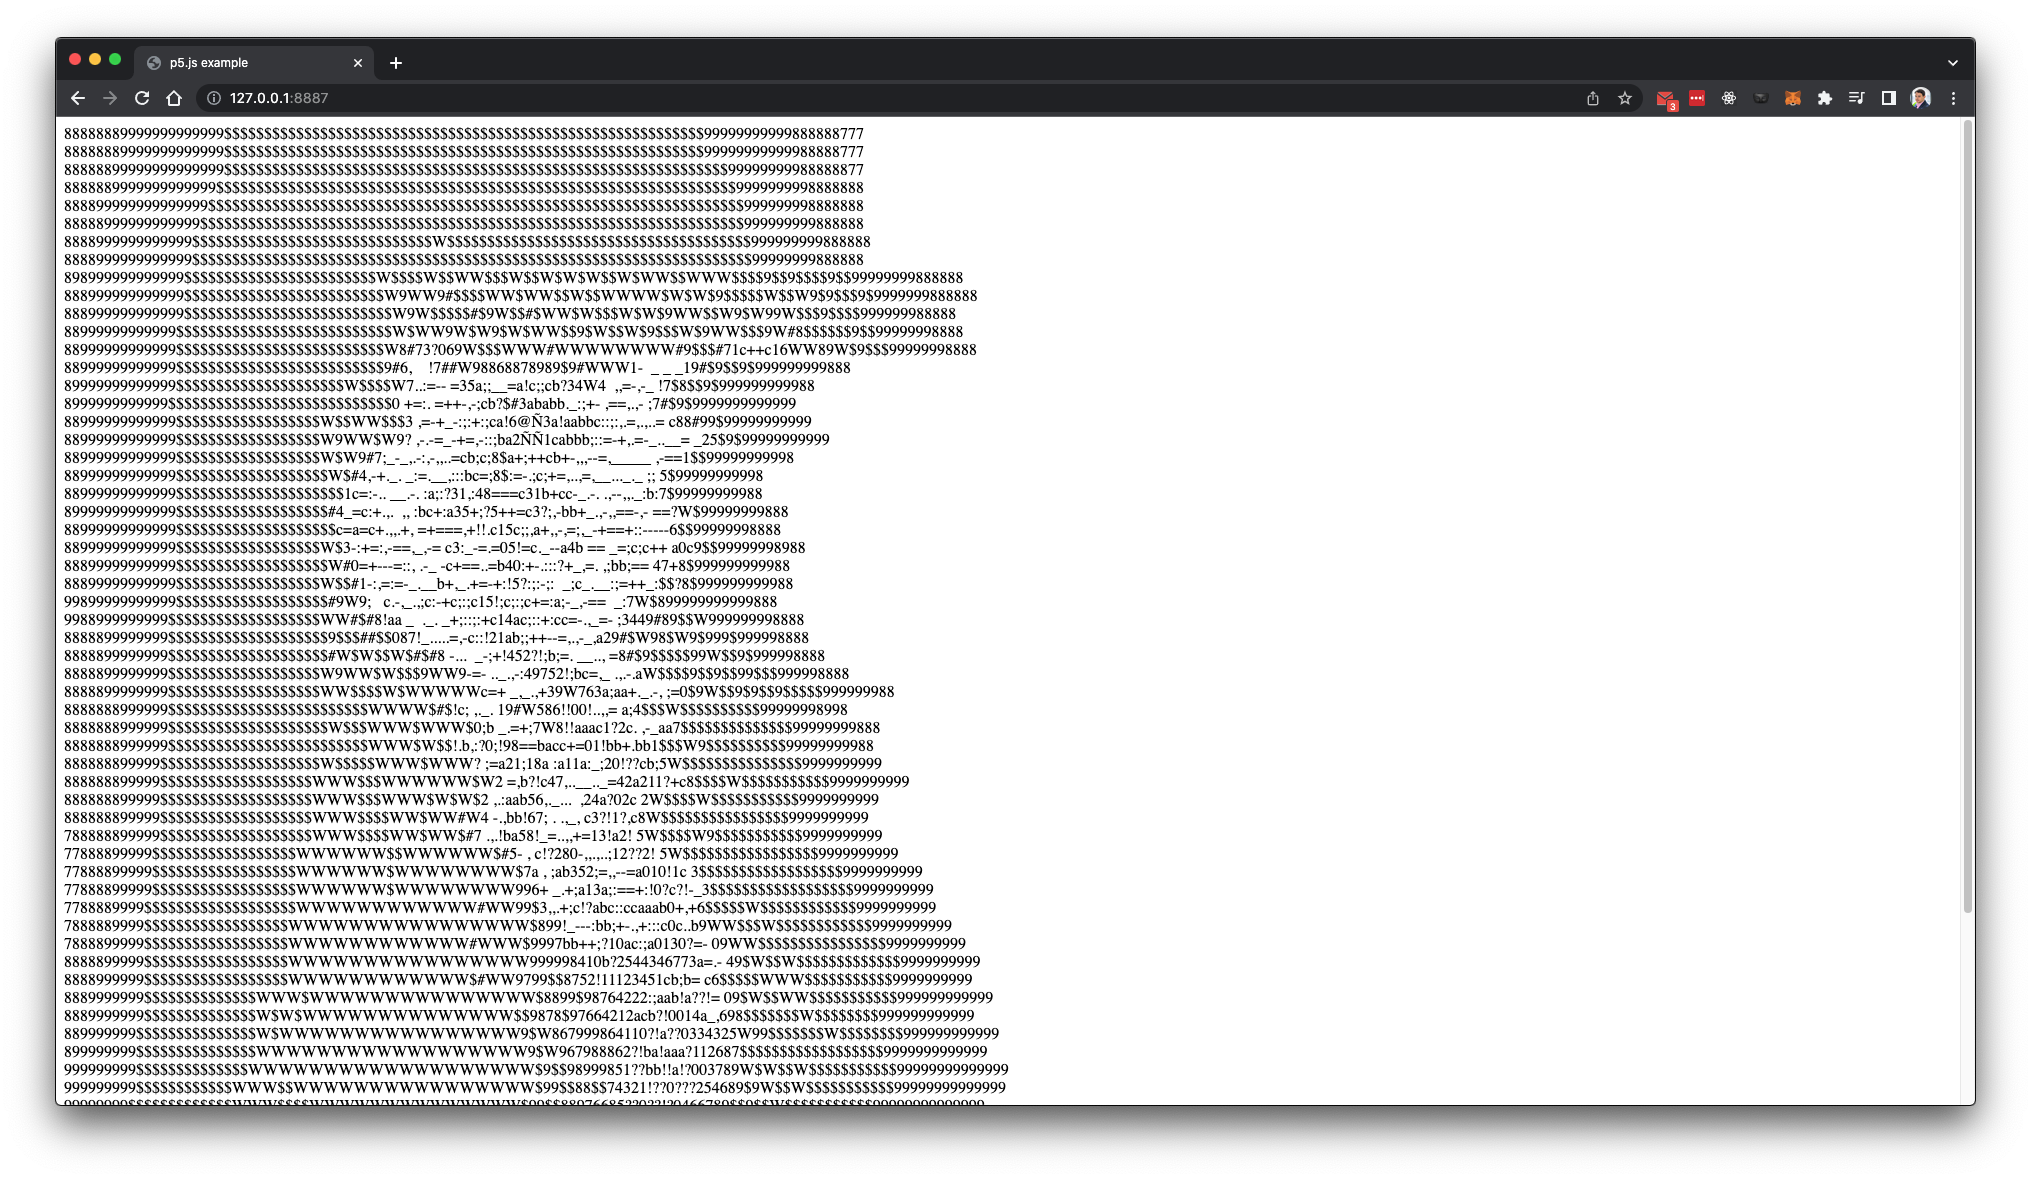
Pondering a bit of my head (a lie, after searching for like 30 minutes on Google 🤣), I understood that the problem is that the default font is not of the type monospaced fn-1, so each letter occupies a different space and we can correct this by using a font of the monospaced type, such as “Courier” or, in my case, “Fira Code” fn-2. If you don’t have “Fira Code”, simply use “Courier” and problem solved.
If we also use a line-height smaller than the font size, we can make the characters even closer together vertically, so we can include CSS similar to the following:
html, body {
  background-color: #000;
  color: #fff;
  font-family: 'Fira Code';
  font-size: 1em;
  line-height: 0.8em;
}

canvas {
  display: block;
}
And our result will be like this:
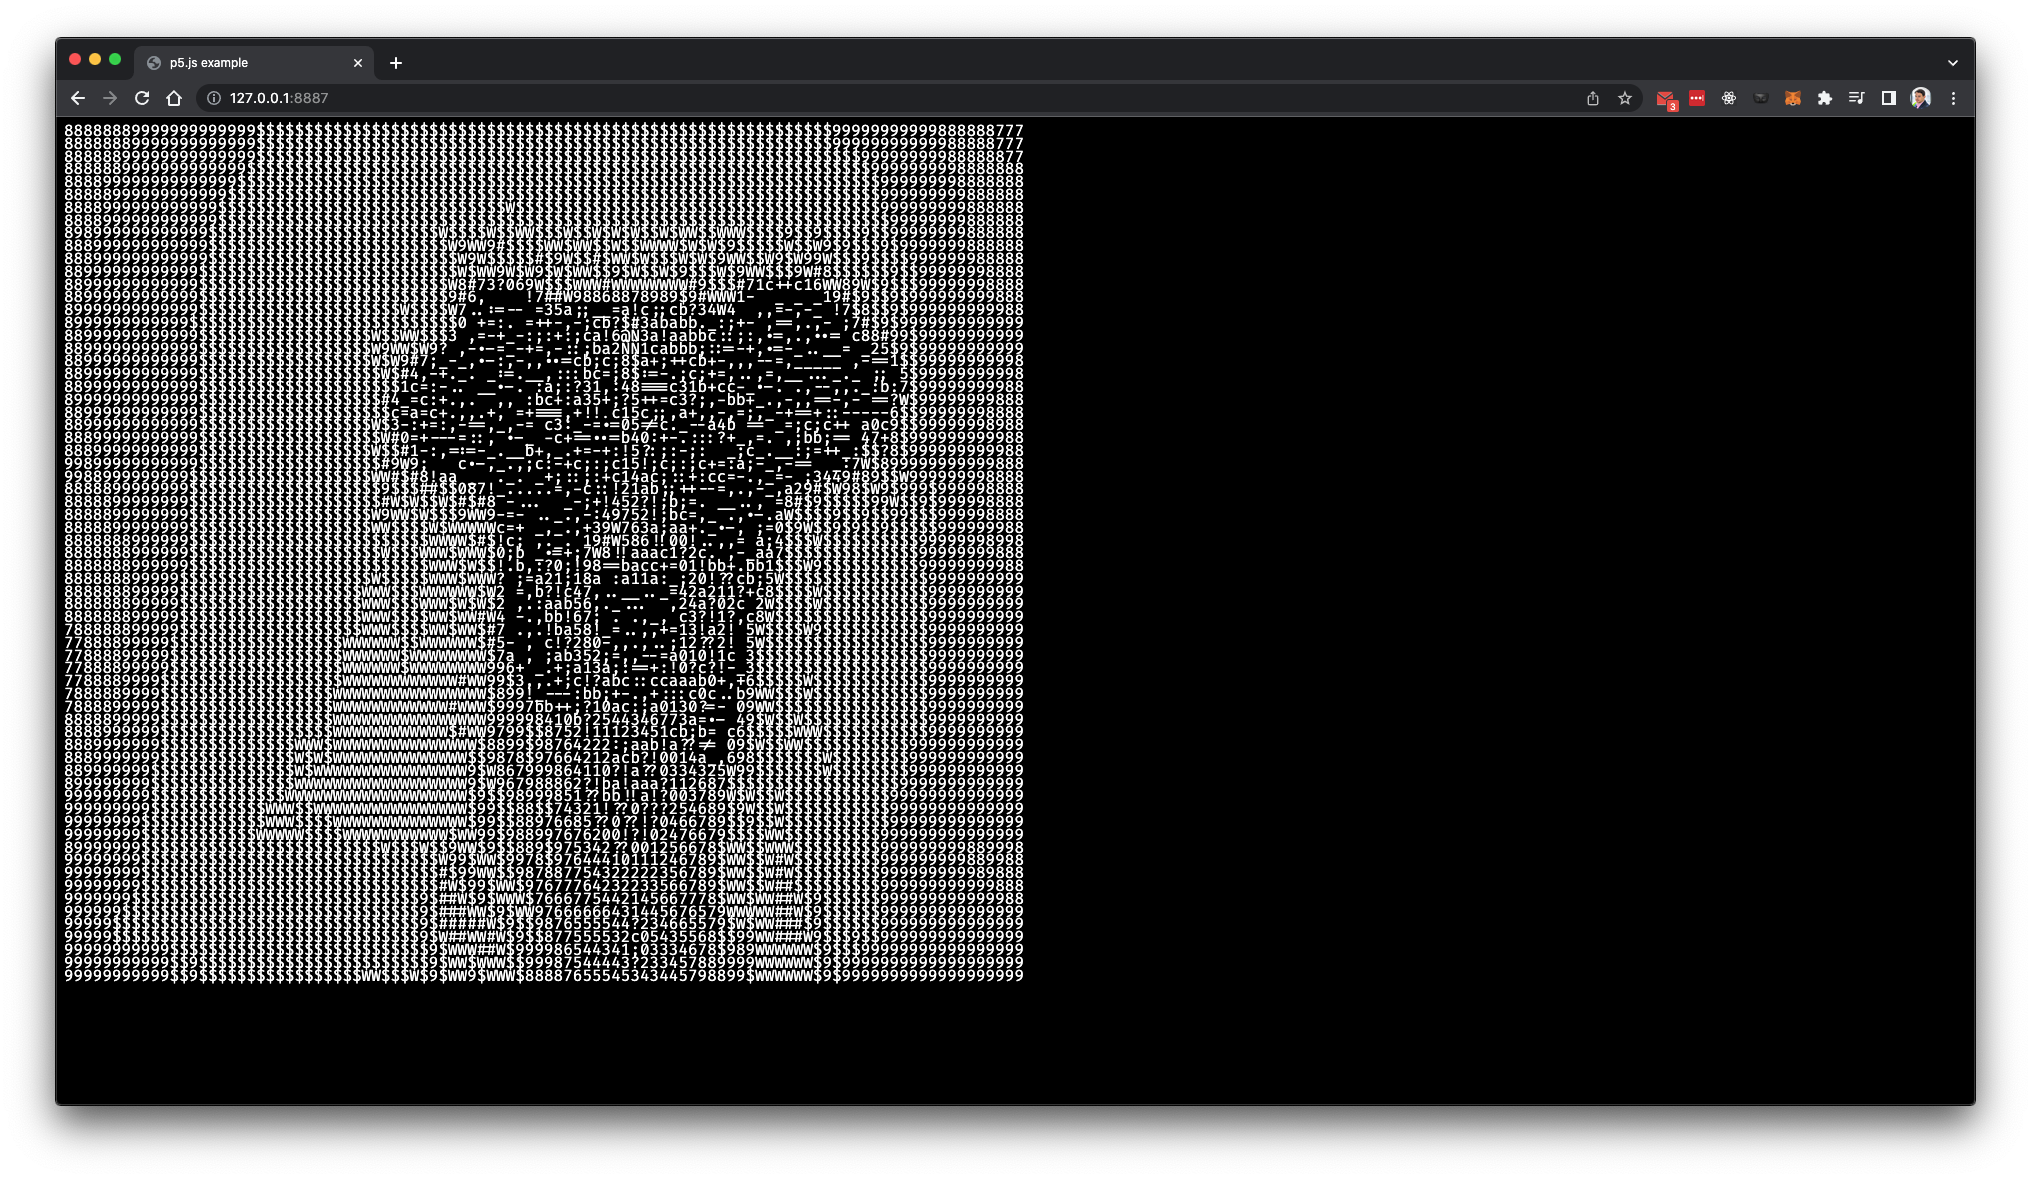
Now he really looks like our little friend in the photo 🐶🐶🐶.
#.Step 2: Doing the same, but with the webcam as the input device
In fact, this part is even simpler. We must do the same, but analyzing each frame of the video separately and we have to display everything as a single content (with its line breaks):
const density = "Ñ@#W$9876543210?!abc;:+=-,._ ";
let video;
let container;
function setup() {
noCanvas();
video = createCapture(VIDEO);
video.size(80, 80);
container = createDiv();
}
function draw() {
video.loadPixels();
// Ahora vamos a tener que desplegar todo como un único contenido
let art = "";
// Analizamos cada columna
for (let j = 0; j < video.height; j++) {
// Analizamos cada fila de esa columna
for (let i = 0; i < video.width; i++) {
// Es importante recalcar que, video.pixels va a regresar un array, mejor
// descrito en la siguiente dirección:
// https://p5js.org/reference/#/p5/pixels
//
// Donde:
// 1. La densidad será x4, por eso debemos multiplicar *4
// 2. Va a regresarse los valores de RGB (en la posición 0, 1 y 2)
const index = (i + j * video.width) * 4;
// Valores RGB y A (promedio / brillo / luminosidad)
const r = video.pixels[index];
const g = video.pixels[index+ 1];
const b = video.pixels[index + 2];
const a = (r + g + b) / 3;
// Floor: Devuelve el máximo entero menor o igual a un número.
// El `map` aquí va a hacer:
// Tomar el valor del brillo (`a`), el cual debe tener un valor entre
// 0 y 255 (atributo 1 y 2) y lo va a mapear esto a un valor entre la cantidad
// de valores entre mi densidad y 0.
const charIndex = floor(map(a, 0, 255, density.length, 0));
const charToShow = density.split("")[charIndex];
// no breaking space (espacio vacio)
// esto es para que quede un cuadrado perfecto, ya que en HTML el espacio
// vacío se representará como un eso, un espacio vacío.
art += (charToShow === " " || charToShow === undefined) ? " " : charToShow;
}
// Y despues de cada línea, simplemente agregamos un salto de linea
art += "<br />";
}
container.html(art);
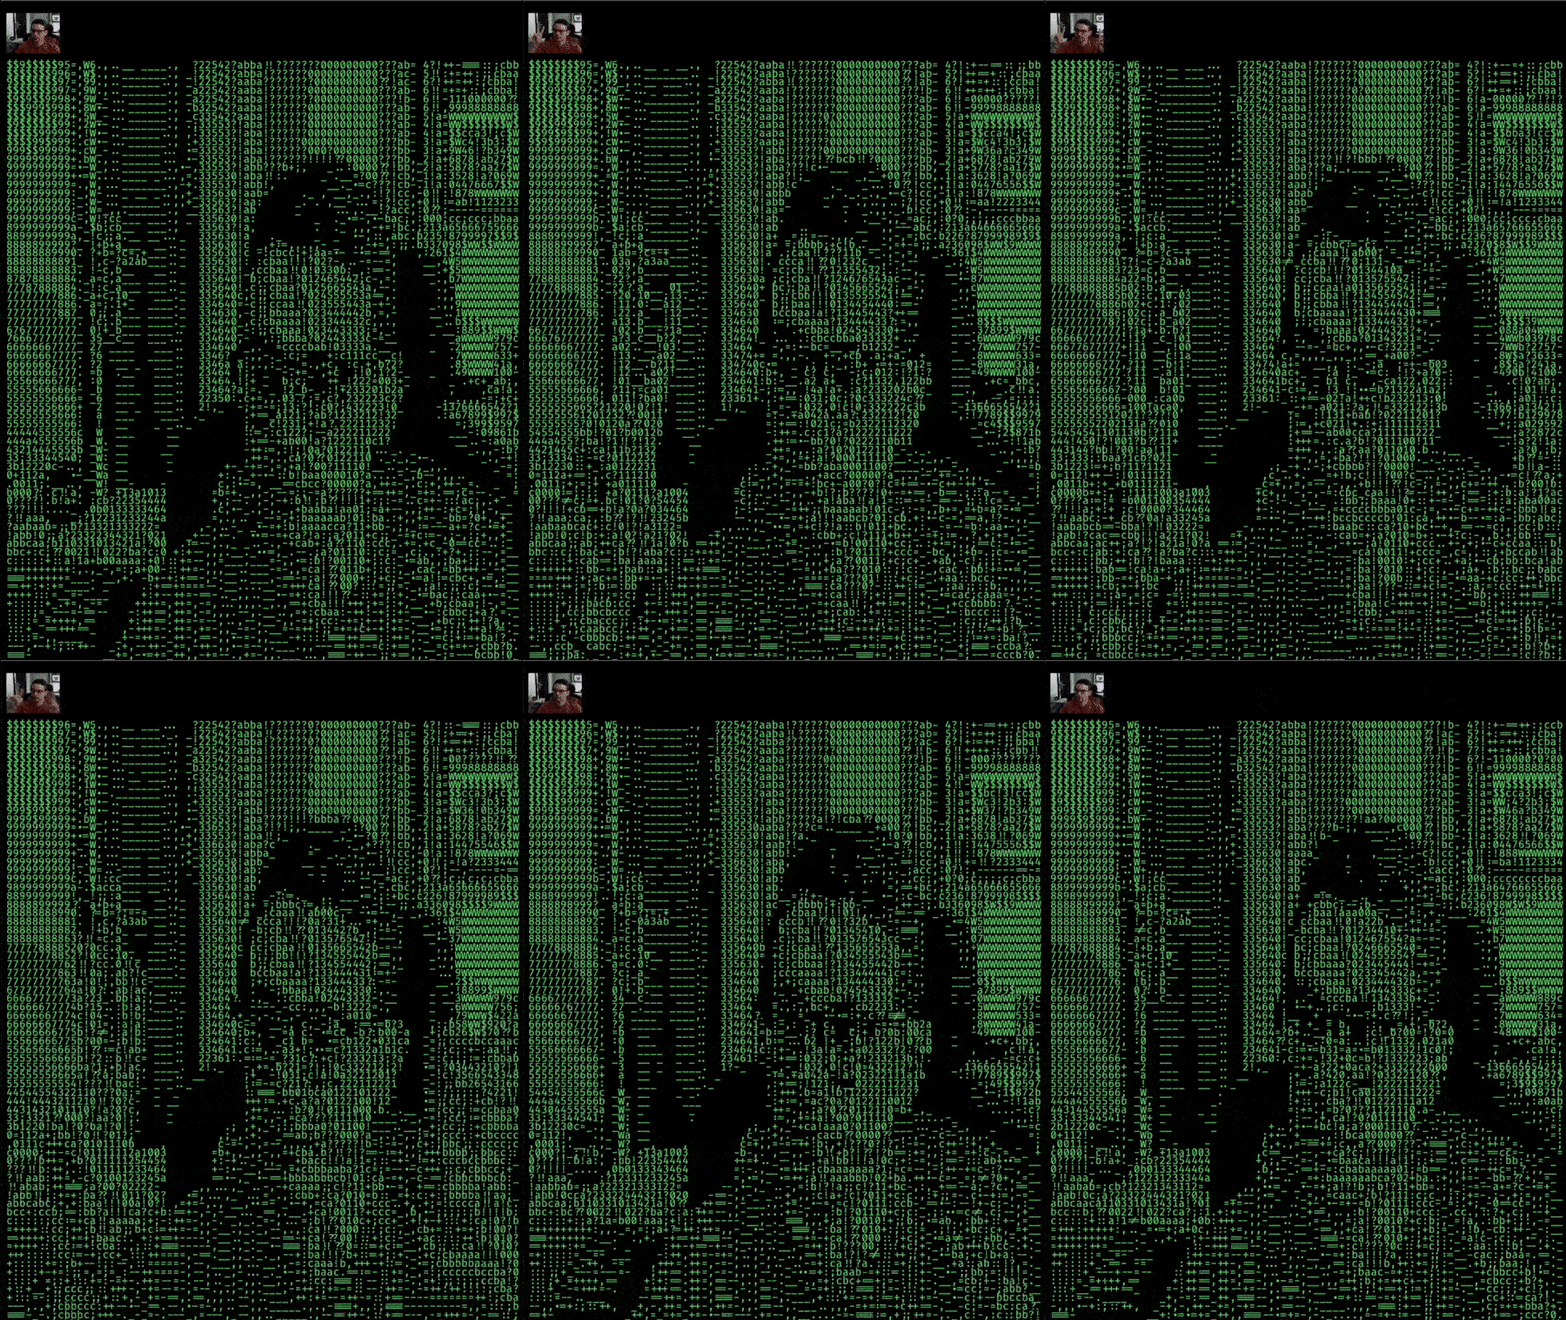
}And the result would look like this, after changing the text to color #64d86b:
- monospaced fonts are fonts where all characters occupy the same space.↩
- Download Fira Code.↩